Thursday, March 1, 2012

How to hold a Pencil - Creatively

I was browsing around pintrist when I came across a unique pencil holder. So I started searching for some other fun pencil holders. Nothing.
I searched Etsy. Nothing. All I found was normal cups or tin cans covered in fabric. I could swear I've seen all these funny pencil holders somewhere in my life. It appears the crafting communities I'm privy to do not really think outside the box when it comes to pencil holders.

However a normal google search revealed many creative and hilarious pencil holder designs. I feel much better. However many of the the clever ones, like this porcupine one, are only available on a Japanese websites. grr. 
All this deep thought about pencil holders led me to evaluate my own. Man I am hardly better than the rest. Cups, jars, a plastic tupperware case. BORING!
I resolve to find better, more exciting pencil holders.

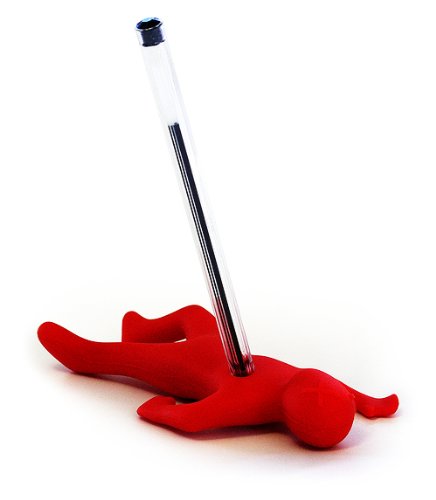
Here are some of the fun ones I came across in my search.

Hahaha that last one just kills me. Ahahahaha.
Okay.

These have potential for out of the box pencil holders. The pencil holder, as in the one that only holds one pencil, cracks me up too. I can just see it on some pretentious graphic designer's or artist's desk. But I still love it.

Where do your pencils live? I understand that a pencil holder with a capacity for one is not very useful. I have a tendancy to never ever throw away pens. So I have four or five different jars or otherwise dedicated to holding my collection of pens, sharpies, mechanical pencils, chap sticks, and nail files. I don't know where else they could live! Don't pencils and pens belong on top of your counter, next to your phone, in a mug?

I do have one inventive place I keep my pens.

I found this little pyrex dish at a antique mall and couldn't leave without it. But it didn't really have a purpose or a place when I got home. So I kicked out some knicknack and put it by my back door to hold stamps and a pen. Even if it is overflowing, it is still cute.

Wednesday, February 22, 2012

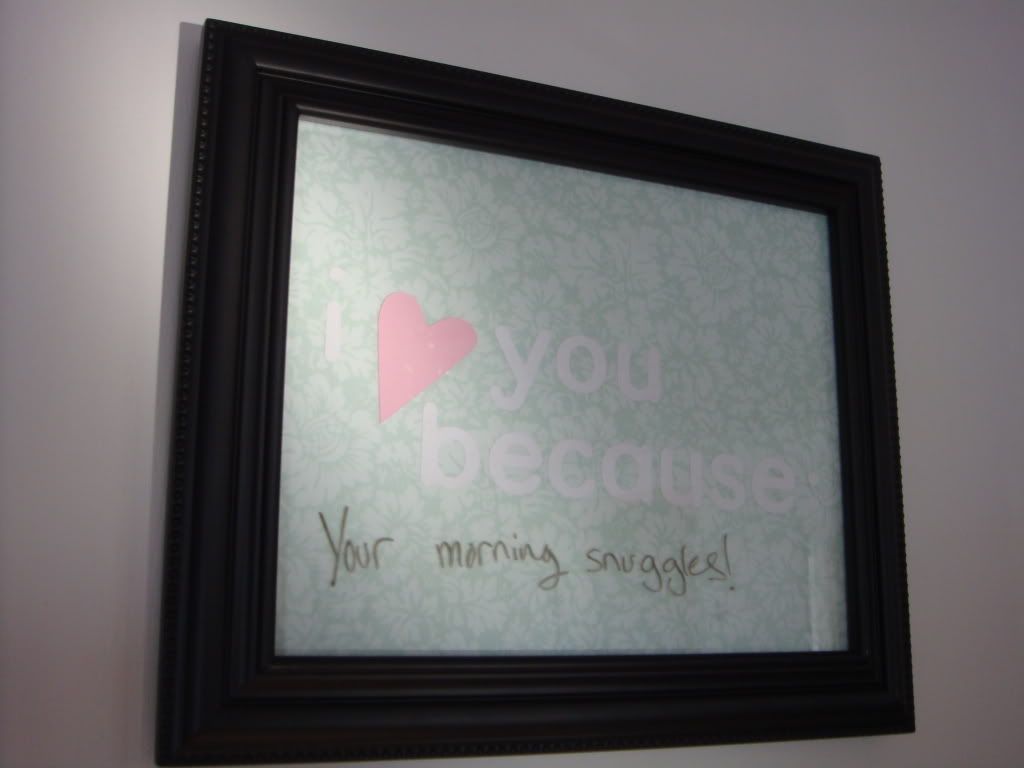
I love you because...

I have recently jumped into the world known as Pinterest. It is the most wonderful, and addicting website ever! It is like a virtual cork board of all your favorite ideas, quotes, favorite websites, and recipes. So lately when nap time comes, that is where I'm usually at, perusing the new fad crafts and exciting things. 

I decided I wanted to try and make something that I had "pinned" recently. I thought this was a cute, easy craft that could be enjoyed by all in the family.
This "I love you because" frame is actually pretty popular right now, google it, seriously. But I still couldn't pass it up, so here is what I did.

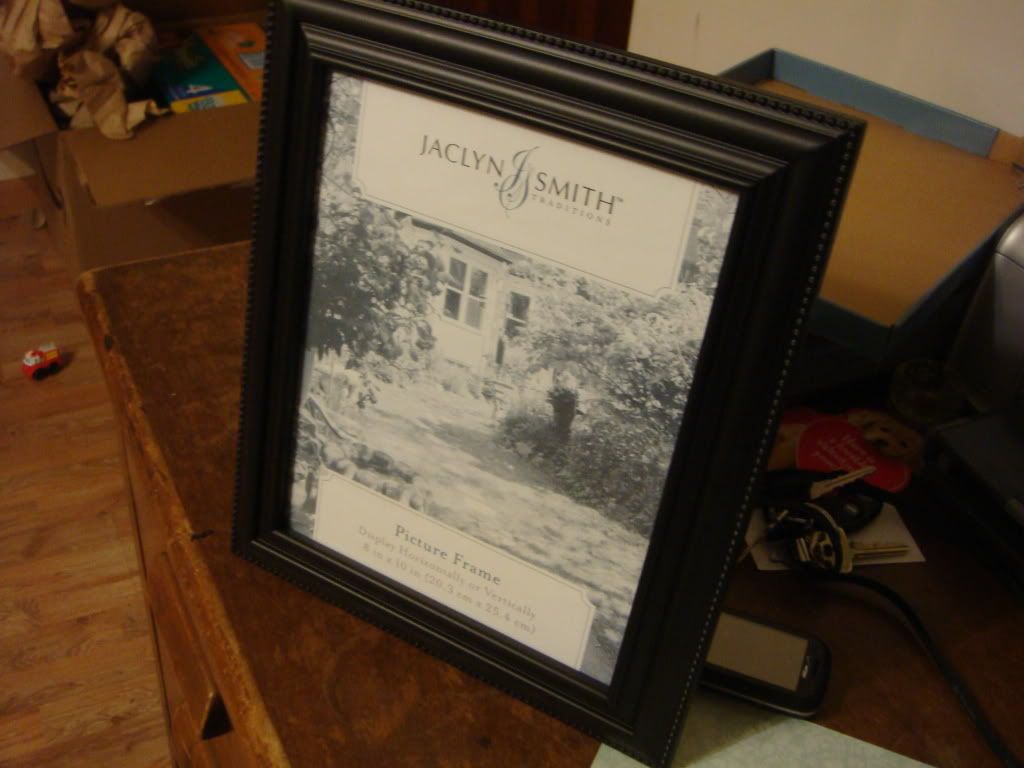
I got a frame that I liked that would match my other decor... (8x10 is a great size for this!)

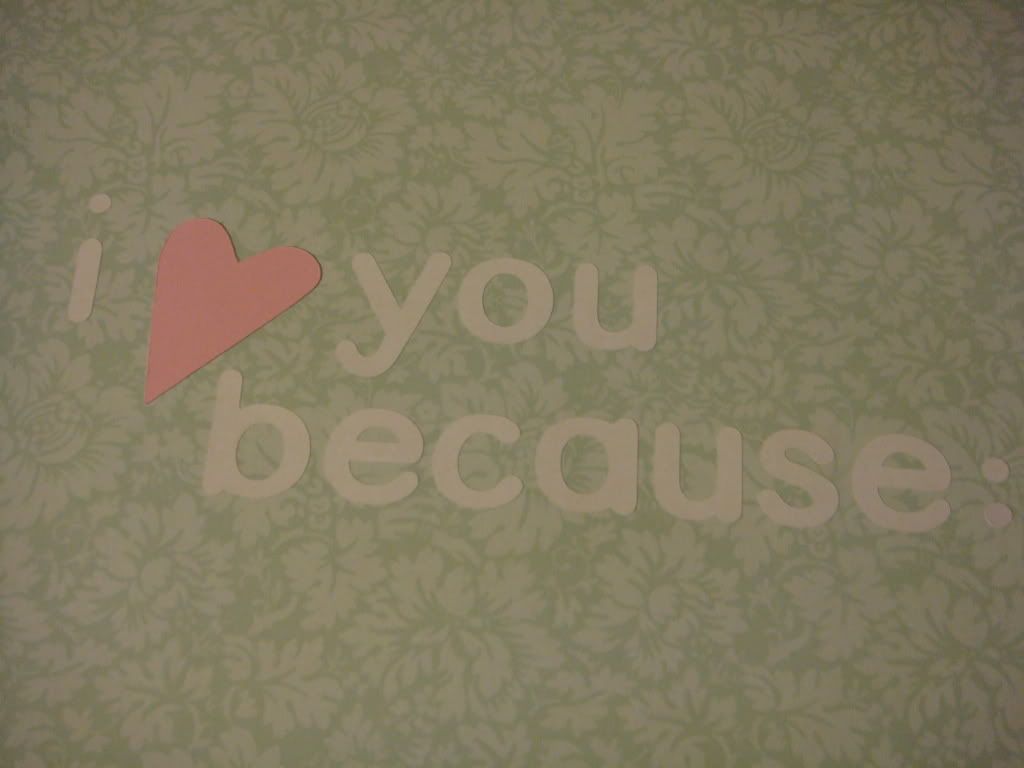
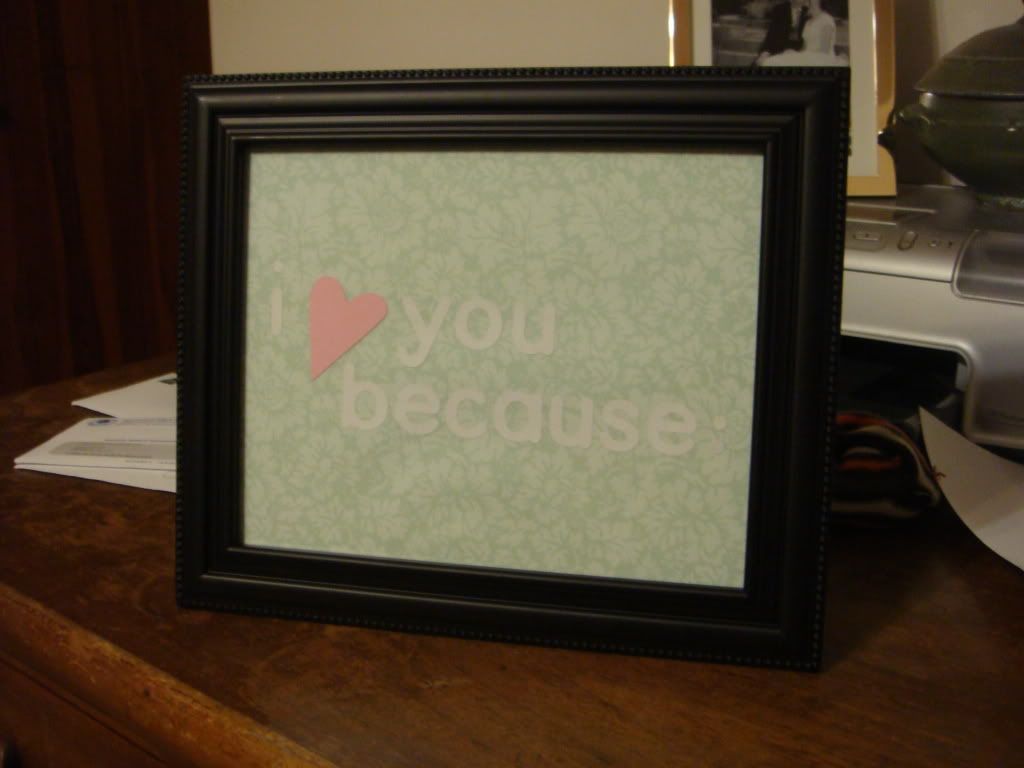
Then using some scrap booking paper and my Cricut to cut out the letters, I glued it all together! I chose to make it a little different than the original one I saw.

Then just cut your paper to the frame size, and (yay!) you have a new cute craft to hang up!

My husband might think I'm a little crazy for making and hanging this, but who wouldn't love to have little reminders of why they are loved? I love my new craft and look forward to all the fun lovey reasons my husband and I will share with each other! Happy crafting!

Tuesday, January 24, 2012

Fave Valentines things

Still need some inspiration for Valentines? Etsy has a million and one valentines things, these are my faves. Here are some snazzy and yummy ideas for inspiration. Bonus, you can still purchase all these in time for the 14th! Even the cake pops!


First we have a funky steampunk key heart ring from ParadiseFindings 
http://www.etsy.com/listing/90816602/sterling-silver-love-valentine-sale?ref=v1_other_1
 
Next are some cuuuute cake pops from mycakepopshop
http://www.etsy.com/listing/90855932/cake-pops-perfect-for-a-birthday

Okay so I know that this last one isn't everyone's style, but I know I could sure use a cupid hedgehog print to brighten my family room-   by HansMyHedgehog
http://www.etsy.com/listing/89962988/8x10-giclee-print-happy-valentines-day?ref=sr_gallery_8&sref=&ga_search_submit=&ga_search_query=valentines&ga_view_type=gallery&ga_ship_to=US&ga_page=21&ga_search_type=handmade&ga_facet=handmade

Monday, January 23, 2012

Printable Valentines

It worked! Aren't they adorable!
I took a minute and printed off these cute Valentines cards from the freebie we posted a few weeks ago. I wanted to make sure they were as cute on paper as they were in my digital file.


Easy peasy. Just print and cut out along the grey lines (don't cut the middle line on the white ones unless you want just squares). I hope you enjoy sharing a bit of valentines love with your buddies this year!

Friday, January 20, 2012

Our Faves

We has such a crazy wonderful end of the year! We literally had photo pendants drying on every flat surface possible at one point. We wanted to share a few of our fun orders this past holiday season!


Thank you to all our wonderful customers!! We love transforming your photos into little pieces of love! Enjoy your new photo pendants!!

Thursday, January 19, 2012

Our Best Bites: Creamy Corn Chowder

Do you remember my favorite Christmas present? Did you run out and purchase it yet? I'm telling ya, its the best cook book ever.

I made Our Best Bite's Creamy Corn Chowder. And let me tell you, as far as soups go, this is probably one of the best I've ever had. I really really enjoyed this easy soup, and it didn't take much time or extra special ingredients to make. I had everything I needed to make it on a whim one night! Here is the recipe:


Creamy Corn Chowder
Recipe by Our Best Bites
2 Tbsp. butter
1/4 c. all-purpose flour
1 c. water
2 1/2 c. milk (skim or 1% work just fine and lighten it up considerably)
2 regular-sized chicken bouillon cubes, 1 Knorr chicken bouillon cube, or 2 tsp. chicken base
1/2 lb. bacon (optional)
1 small onion, minced
2 red potatoes, diced into small cubes
2-3 cloves garlic, minced
1 can corn, drained or about 1 1/2 C frozen fresh corn
Salt and pepper to taste
A few dashes of hot sauce (like Tabasco or Cholula)
Fry bacon until crisp. In the meantime, melt butter over low heat in a soup pot. When melted, add flour to make a roux and whisk until it comes together in a little ball. Add water and whisk until completely combined and there are no lumps. Add milk and chicken base or bouillon and bring to a simmer. Add potatoes, onions, and garlic, and simmer (but don’t boil!), stirring very frequently, for about 20 minutes or until potatoes are tender. Add crumbled bacon and corn and heat through. Add a few drops of hot sauce and then salt to taste. The reason why I don’t have an exact measurement is that while the soup REALLY needs salt, bacon also really differs in its saltiness, so it can be super easy to make this soup waaaaay too salty. Start with about 1/4 tsp., give it a few minutes, and then add more if you need it.
Ladle into bowls and sprinkle with extra bacon and/or cheese if you want. Because, you know, if there’s anything a perfectly healthy bowl of soup (it’s only 3 Weight Watchers points!) needs, it’s some extra bacon and cheese!
Serves 6-8.

I highly reccomend you try this soup, especially with the weather that has been going around. Get some crusty bread and dip chunks into it- YUM. I am actually making this soup for my parents that are visiting this weekend! Happy cooking!

Saturday, January 7, 2012

Printable Valentines

 Not only is Valentines Day the best excuse to send a love note to all your bosom pals and remind them how much you love having them in your life, but it is also my birthday! I grew up completely believing the world was celebrating my birthday by decorating their stores with pink hearts. Sadly the truth is out, Valentines was not set up to celebrate me, but I still love it as a holiday as well as my birthday!

It is the greatest excuse ever to wear pink, decorate in pink, and eat pink things!! (we'll get to this later!)

Aside from the pink, it is also way fun to share little love notes. So we wanted to share some adorable time saving valentines with you! They are so sweet and ready to print out!


These ones are set up to print on an 8.5x11 piece of paper. Just right click, save file, and print from any number of programs! (Files are Jpg format, so you can put them in your photo program and print from there! )


You can cut out the squares, the hearts. or cut along the grey lines and they fold into three 3.5in x 3.5in cards. How easy is that! I recommend using white cardstock paper for the best print and card feel.

I'll print them off later (my toddler just woke up from a 2 hour nap!) and take some pics so you can see the adorableness first hand. 
Happy printing!

Thursday, January 5, 2012

More

Well new years always bring new ideas about how you are going to live your life.

I don't plan on changing much. I had a really good year last year. I figure if it aint broke don't fix it.

This little blog however needs some life. So I guess I do resolve to be better, more fun, more free, just more of anything really would be better than what we had going.

So there ya have it.

I'll just do more.

:)

Stephanie


Tuesday, January 3, 2012

My favorite Christmas Gift!

Happy New Year all you JubJub lovers! Did you have a fantastic holiday season? Are you ready for it to be over and to move on? (Me too!)

This year is going to be a great year, full of lots of new and exciting things. That also includes our shop, so keep your eye out for giveaways, free chains with purchase of pendant, coupon codes, all sorts of good stuff. We currently are in full swing of our Buy 3 Get 1 Free promotion. Its a great deal and never too early to think about Mother's Day, Birthdays, or heck, maybe even Christmas for next year! =)

Speaking of Christmas, I wanted to share what my favorite Christmas present was that I received this year. I love cook books. I am a sucker for a good recipe, and an even bigger sucker for good cook books full of good recipes! I follow a blog called Our Best Bites that posts amazing recipes that are SO good! They have all sorts of variety, and they only post things that they like, and think are easy to make. They don't work with too fancy or expensive ingredients because they are regular people/mom's just like me. 

Anyway, my mom (hi mom!) gave me their cook book this year for Christmas!

Doesn't the cover page look good enough to eat?! Imagine what's inside!

I have actually been looking at all the recipes for the last couple days, planning out what I want to cook.

This "Creamy Cilantro-Lime Ranch Dressing" is on the top of my list. I know you are thinking to yourself, "you want to make a Ranch Dressing? Woopie..." Seriously people! You have not loved life completely yet until you have made this dressing to go on top of a killer taco salad. Have you ever heard of Costa Vida or Cafe Rio, or even Bajio? They are all similar places that sport this dressing that make my life, and yours if you tried it, complete. Go HERE for the recipe to try it.

I guess the reason I am so excited about this recipe besides the fact that it is literally on my "favorite foods ever list", is because I have tried to duplicate this recipe without too much success. Mine was alright, but not the real deal.

So thanks mom for my sweet gift! And YOU out there reading this right now, go try this recipe, or find some other yummy recipes on this blog. I promise its worth it! Or pick up the cook book!

Happy cooking! (or eating!)

Friday, December 9, 2011

Dollar Store Pop!


We are SO busy with orders we barley have time to post on our blog!!

But I wanted to share my fave part of my house this year. I relish the opportunity every year to do something festive over our fireplace mantel. I use mostly the same elements each year, but I always like to add a new twist. For the last few years I did new stockings.Last year I added photos! This year I decided it was okay combo my two different types of stockings.

The majority of my decorations are collected slowly. This mantel took a few years to amass. However, the fun little pops of color and spark, plus the frames are all from the Dollar Store!  It isn't much but it adds to the overall effect. A few ornaments here an there and 5 dollar store frames (I didn't even paint them) and 5 holiday-ish, winter-ish photos and printed in black and white, a few 3M hooks later, wala! A personalized holiday wall that features my most treasured memories and pretty things.

Hmm if I were giving tips for doing your own mantel they would be, pick only 2 - 3 colors, vary your height (one of the hurricane vases and one of the porcelain figures are each on a upside down glass vase for height), use your local Dollar Store for little perks, and 3M hooks are every girl's friend!

Happy decorating!

Monday, December 5, 2011

How to decorate your Christmas tree!

Happy December and Merry Christmas!
Goodness I just love this time, who doesn't really? I love how everything feels festive, people are kinder and happier. You get to see all the lovely decorations and put your own up that make your home feel a little warmer.


Saturday, November 19, 2011

Giveaway winner!

Congratulations Lisa! You've won our Christmas giveaway!


Lisa said...

My favorite is the 3 trees! :)

Monday, November 14, 2011

Happy Thrifty

I am a Goodwill frequenter. Maybe 3x a month. I have a select list in my head of items I am willing to buy at Goodwill:
Wool sweaters (for crafting), glass kitchen stuff (I am on the hunt for an adorable butter dish with matching lid like my grandma has), maybe fabric or sheets for crafts, and art or frames.

But I am very selective. If I cannot conceive of where it goes or how I am going to transform what I am buying, I don't buy it... Most of the time. But this was a no-brainer.


First, it is a print of Degas - a famous artist who loved painting ballet, and I've loved this artist since high school. Second it is a cool piece, not framed but adhered to the wood with an external frame thing. Third, it is from the Z Gallery. WHat! Their art starts at $39 and goes way up from there..
Fourth, it is an artist the hubby likes and from a place the hubby likes so he can't complain one bit.

I heart good deals.

Saturday, November 5, 2011

New Christmas Pendants and a GIVEAWAY!

Its that time of the year again!


Its the time when the air is crisp, when the stores are full of decorations, when you are thinking about your own decorations and what to get people for Christmas! We understand that Christmas shopping can be hard sometimes, but Stephanie and I like to think that we can make it easy for you! We have several options available for a personal, and affordable gift for a loved one. 
Check it out here! Also remember to check back in the coming weeks as we will be putting up more new product for personalized photo pendants!


Since it is the gift giving season, and Stephanie made some new rad Christmas themed pendants, we want to share them with you! Here are the new, super cute pendants!


Don't you just totally want one of these? (Or maybe all of them?!) Well we can at least help with one because we are giving YOU the opportunity to win one for the holiday season!

There are 3 different ways you can enter, each way giving you an entry. (So you can enter up to 3 times, boosting your Christmas winning chances!)

1. "Follow" this blog by going up to the VERY tippity top and clicking on "Follow". It is on the blue Blogger header, in the far left hand corner. Leave a comment saying you are "following" us!

2. Go on your Facebook page and share this link>>>>>  http://jubilationstudios.blogspot.com/2011/11/its-that-time-of-year-again-christmas.html  so your friends can know about our pendants and giveaway too! Then leave a comment saying you did so!

3. And lastly, tell us which new Christmas pendant is your favorite, and leave a comment telling us so!

Please leave a separate comment for each entry, so we can be sure to count you accurately.

SEE, its super easy, and you have 3 chances to put your name in the drawing! Get your friends or mom to do it too! Maybe they could win it for you! 

The winner will be announced November 19th! 
Good luck and...


Friday, October 28, 2011

So I look in my mailbox and I find this odd little box sitting in the back. Not thinking much of it I gathered it up with the rest of my mail and threw it on the kitchen counter. A day or so later (because sorting your mail when it comes out of the mailbox is way too organized for me) I actually look at the odd little box and figure out it is a little box of tissues. It is addressed to me and in very tiny print on the side it said "Sent from Heidi."

Who else but my sister would think... "Hey there are free samples of tissues online! I know, I'll send a box to my sister. She probably needs them." and then I bet she thought something like "She's the biggest snot I know!" ha ha ha. No I bet she really thought "My sister doesn't know how to breathe through her nose, she could definitely use some tissues!"

Thanks heidi. I blow my knows in your general direction, with love.

Wednesday, October 26, 2011

Leah 2011 - Fave things

I had to share my fave from a cute series of pendants we did last week. This little Leah cracks me up. It is harder to see in the pic, but the blue glasses gave off a blue hue that  made the whole pendant look dreamy. I love the slightly desaturated colors that let the cute goofy smile and smirky glasses show this cute girl's personality. Love it!

Friday, October 21, 2011

Toddler Craft - Ghost Foot Prints

I have a fetish for foot print and hand print stuff. Any time I could figure out how to put my footprint in an art project growing up.. I did. Weird I know.  ANYways. I saw this cute craft somewhere online and I had to try it out with my own toddlywink.

Supplies:
Black Paper
White Paint
Black Sharpie
Glue Dots

Other stuff you might want:
Drop Cloth
Third hand to handle painted child
Paper Plate


It isn't that difficult of a concept. Paint on paper plate, dip child's foot in, press to paper (or I sat my child on the sink and pressed the paper to his foot, much less messy). I wanted six ghosts front and back for my front door, so I did six left feet and six right feet. Dry. Then draw all the little spooky faces you want.


Cut them out. I liked a straight line across the toe area, it looked like a ghost silhouette. Then I taped two back to back, not caring at all about if they matched up or not. Which is weird for me.

FINALLY- and this is my tricky Stephy trick, I put scrap booking glue dots on the ghost mouth to attach them to the window! You don't even notice it from the front side. Brilliant!


Now go rush to your windows and put them up!!!
However, when I went rushing to my front door (because I really was so excited!) I fount this little guy waiting for me. Not frightening in any way right? Yea well you wouldn't have known that from my reaction.

Naturally after I was done screaming in surprise, I logically- quickly stuck all my ghosties to the windows and ran back to the kitchen for a cup and a piece of junk mail. I came back just in time to see it scamper under a nearby toy. I opened the door and waited. Nothing happened.
So I moved the toy. AAANd the thing came running at me. So what does a grown woman who thinks lizards are really cute do? Scream, uncontrollably, like a girl, and run away.

After I stopped laughing at myself I herded the little guy out the front door and proceeded to photograph my cute little ghosts.


My toddlywink LOVED this monday night activity, and still shows me the foot prints in the window and asks to paint his feet. (not with words mind you, but with emphatic gestures.)


Posted by Picasa