Showing posts with label toy story. Show all posts

Friday, October 14, 2011

Jessie's Red Yarn Wig - DIY

I have to say, this was one of the craziest ideas I've had in a long time.
Sure, I can make a wig. Never mind I've never even worn one before.

So I don't claim that this is the most professional, long lasting, easiest way to do this. But I couldn't find anything else on the web to help me, so maybe this will help you.

Supplies
Large Red Yarn - 3 bundles of it
(sorry I don't know these technical terms, you want it thick, red, and 3 bundles of it at least.)
Red fabric - just a small piece
Crappy Tape
Pins
Sewing machine & red thread
a foam ball, or foam of some kind

Step 1. Measure from your forehead hairline to your back of the neck hair line.
Cut a strip from the red fabric this length and 1.5 inches wide. Round the "front" of it- see pic below.

Step 2. Make some sort of support for your ball to sit on so it is secure enough to work on. You'll see mine a few pics down. Super inventive I know.

Step 3. Pin the fabric onto the ball, and place crappy, not too sticky, masking tape sticky side up over the fabric. On second though, you could just use some fabric tape here and stick it under the fabric and never remove it if you want, just don't put too much tape showing.

Step 4. Begin unraveling the yarn to make the hair. I held the end in one hand, and with the other continually draped the yarn over my arm. The length of the loops were around 3 - 4 feet long. Just do one yarn bundle for now. Don't cut the ends yet.

Steps 3 & 5

Step 5. Gently place the yarn onto the tape, pinning as needed. Don't press it down too hard, it will stick.

Step 6. Sew the yarn in pace by making one seam down the center. This will look like the "part in her hair."

Step 7. Repeat 4-6 with the other two bundles of yarn until the majority of the red fabric is covered and there is no white ball showing through. You don't need to cover all the red fabric, just use your judgement of how much hair you need to hide in this wig. For longer hair, use a shorter amount of the fabric strip. This will leave more loose space to put your hair in. I think my strip was around 9 inches long, and my hair comes slightly past my shoulders.

Step 8. Cut the ends and start braiding! I used an extra piece of yarn to tie the top and bottom.

Step 5 & 8


Step 8. Carefully remove the tape and trim the ends of the braid.

Step 9. Parade around in your new Cow Girl Jessie Yarn Wig!!!


For the actual use I put my hair in a bun and had someone tie a piece of yarn around the wig and bun together to secure the wig. I also used lots of hair pins to hold the backside in place. It worked perfectly and I was able to comfortably wear the wig all night!!

My crowing compliment was at the end of the night when I finally tucked the wig behind my ears, revealing my real brown hair, and heard a small gasp behind me. Later on the Disney bus ride back the Grandma sitting next to me told me her granddaughter knew I wasn't the REAL Jessie because she could see my brown hair.
That made me feel so good. That means she questioned it for a second at least! You can't ask for more than that out of your costume.

I found the hat at the Disney Store in the mall for $12 ish dollars.

Back views


Toy Story Costumes cont: Jessie Chaps & Woody Vest

Supplies:
White Vinyl
Black Felt
Black Piping
Fabric glue - I used Fabri-Tac by Beacon
Sewing stuff.
Jeans you don't want (or that have huge holes in the knees even though they are really nice jeans)

I wanted to use a really heavy fabric for the chaps and vest so they would hang like real leather. luckily the craft store had two large fabric remnants of white vinyl. Nice.

I searched the Internet for Jessie pics and Jessie costumes to find ones that were close to the character. I used this inspiration pic to get a feel for what the chaps should look like>>

Then I just started cutting. I pinned one chap to the pair of pants I was going to donate to this costume, refined the shape a little more, and then cut another one for the other leg.
It is very helpful to have a toddler help you practice being "scary" while you ponder upon the shape of the chaps.
Then using tracing paper, or tissue paper, I cut out some cow print spots that resembled the cow spots on the actual Jessie character's pants.

You can guess the next part. Cut, place, glue.
Finally I sewed the black pipping around the outside edge, and added a few white frills off either chap.

Then, well, this is the part I hadn't thought of till it was upon me. I had to hand sew each chap onto my jeans. I don't know what else I was thinking, but I really thought this step would be easier. It wasn't bad, I'm just not very talented at sewing so it was slow.

Buuut:
wala! Jessie cow chaps!

Honestly the vest is exactly the same process just no black piping.

Using a vest we already had, I just traced the outlines onto the vinyl, cut it out, and sewed the ends together. Poof. Vest!


 Then again with the analyzing Woody's cow print on his vest and making my own similar cow prints.

Lots of glue later...


OH yea. I added a Styrofoam ring and some rope on a safety pin to make pull strings for us both.

Thursday, October 13, 2011

How to Trick out Your BUZZ Light year Costume

We can't do things normally in my house. I'm very sorry. With an artist and an engineer everything is a problem to solve an every problem must not have a mundane answer. SO. Brian suggested Toy Story for our costumes this year. I suggested we be Woody and Jessie. Brian suggest Brad be Buzz. Then Brian suggested we add LEDs to Brad's costume... THEN he suggested that the LEDs blink.
So yea.

Step 1. Find a cheap, slightly large, Buzz Light year pj outfit.
We found ours at a consignment sale. It is a 4T, and our little guy is 24 months, but it still worked out.

Step 2. Brighten it up.
I used a regular BLACK fabric marker to darken the lines and the black areas to make it look new. It worked!


Step 3. Using the thickest Pellon fusible fabric backing you can find, create a pocket. Following the basic shape of the green area, make a vest shape. Fold the pellon in half so you have two attached mirror vests that you can fold up to make a pocket. I cut the side facing the body so it would be easier to get into... but I don't suggest this. It made his costume pooch. I do suggest ironing on a soft fabric on the outside iron on surface. (If you make it you know what I'm talking about.)


Step 4. Turn it over to you engineer for a few weeks so he can figure out the light thing he wants to do, and actually have time to do it. My engineer decided to have FLASHING red and green LEDs. This was more complicated of course, and required several trips to RadioShack and another to Frys. But it is so cool, it was worth it! Since Brian wanted the LEDs to blink it required a circuit board which in turn required some sort of protective plastic enclosure. If the lights were just to stay on you do not need a circuit board.(WHICH IS SO MUCH SIMPLER AND LESS BULKY)

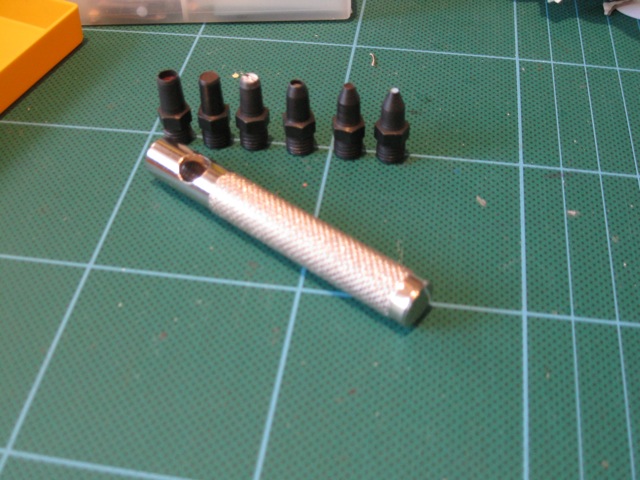
Step 5. Plan where LED will go and punch little holes through the outside facing part of the pocket. I found it best to punch from the front to the back. I used the smallest size hole punch for our small LEDs.


Step 6. Tape ALL the wires down (we used fabric tape it worked REALLY well). Ours has a black enclosure box to hold the circuit board, and a wire for the battery.
 Inside out:

 Right side out!

Ready for the big reveal!!

Brad wore his cost ume the whole night! He even wore the wings for most of the night too! (Attached with velcro and made with that craft foam stuff glued together. We can discuss the horrors of gluing that stuff together another day.)


You can see some of his little LEDs glowing in this pic! Yea we put LEDs in the wings too. So cute!

Wednesday, October 12, 2011

How to make a Woody Costume

Woody is actually not too hard of a costume- especially for a guy. Blue jeans, boots, a hat, a red scarf, a sheriff's badge- are all things you either already have or you can get a dollar type store. We actually are not cow people and didn't have boots and couldn't find them for cheap, but the costume turned out just fine anyway. Woody's yellow shirt and cow vest are another story...
Ya see, these two items and the hat, are what make up the Woody caricature. With out them you are just a cowboy, so it is important to make them look as proportionately close as possible.
Okay done lecturing.

I found my yellow shirt at a thrift store. It was actually a challenge to find a "yellow" collared shirt.

The stripes...
How do you think you would put stripes on a shirt??
Yes that is exactly how you do it.
Red fabric marker and a ruler.

Tip: Start with the back so you can get the hang of it on the side that will be covered up by the vest!
I slipped my fabric cutting board under the shirt and could see the grid lines through it! So I just used those as my guides rather than measuring each line!


Tip: For the sleeves, create parallel lines using the top of the sleeve as a guide for the horizontal lines. It doesn't matter where they begin or end really, just keep everything at 90 degree angles. The same goes for the vertical lines. Just as long as they are square to the horizontal lines. (the top of the sleeve in the photo is the part by the horizontal ruler. sorry it looks confusing)


What! It already looks like Woody! In the end I used 7 fabric markers and took 3 trips to Joannes.  You probably could use a sharpie, but they bleed a bit.

Wondering about the vest? We'll get there. Check back soon!